Step 6 - Managing Sub Location
How to Create a Sub Location

Ant Queue
Last Update 6 years ago
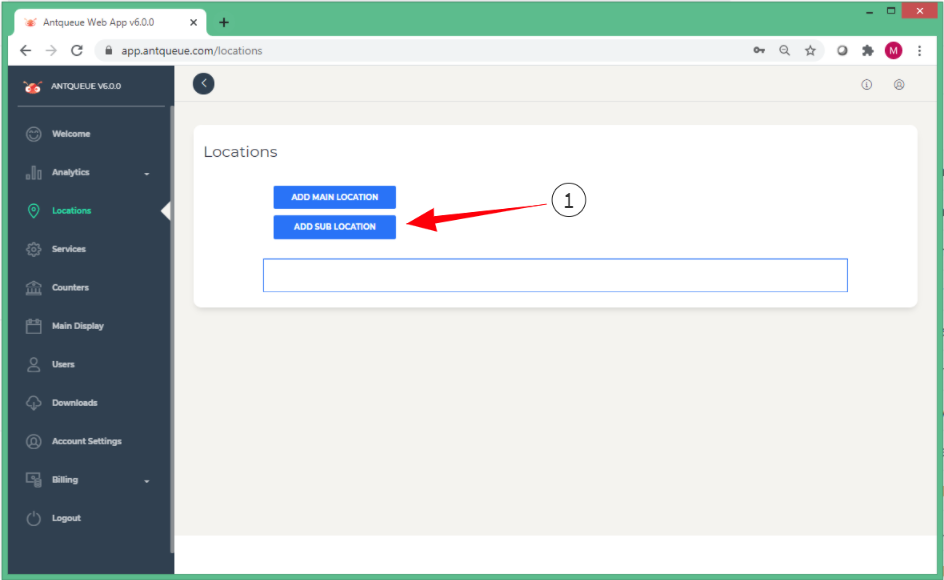
1. Click this button to create a sub-location.
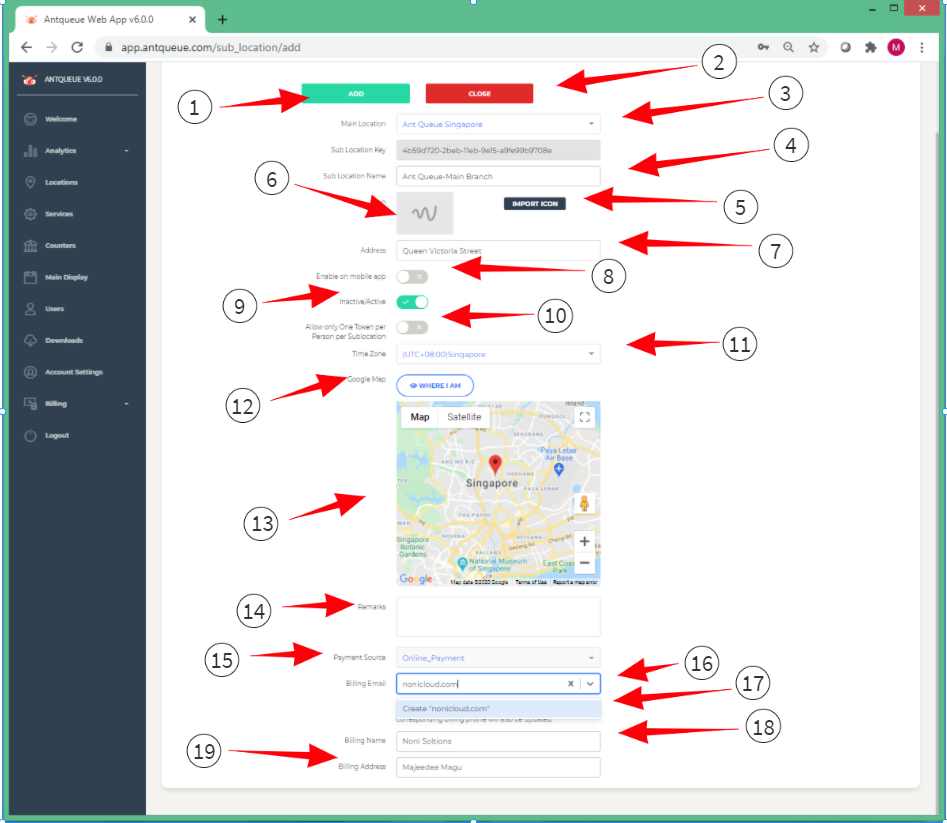
1. Click this button to create a sub-location after filling in the required information below.
2. Click this button to close this page.
3. Choose from your main locations to create a sub-location.
4. Type your sub-location name of choice.
5. Import sub-location Icon of choice.
6. Preview of your imported sub-location icon.
7. Type Address.
8. Name and Icon will be visible on the mobile app if enabled.
9. Activity status. If enabled users will be able to see this sub-location. If disabled, users will NOT be able to see this sub-location.
10. If you wish to allow only one token per person per sub-location.
11. Select your time zone for your country.
12. Your location.
13. Select your address via Google Maps.
14. Type remarks.
15. Select how you want your payments to be.
16. Type your billing email.
17. Click to create billing email (IF NOT CLICKED YOUR BILLING EMAIL WILL NOT BE SAVED).
18. Type your billing name.
19. Type your billing address.
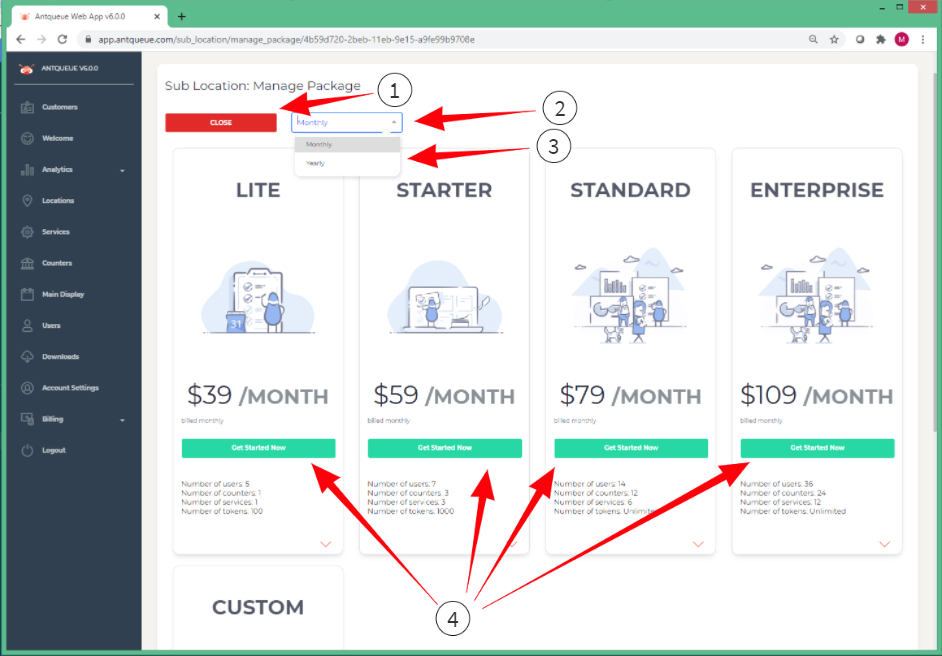
1. Click this button to close this page.
2. Select if you want your packages to be monthly. (Charges per month).
3. Select if you want your packages to be yearly. (Charges per year).
4. Users will click this button to purchase one of your preferred packages and you will be connected to one of the most popular and trusted payment gateway (STRIPE) to proceed with the next steps of the payment.
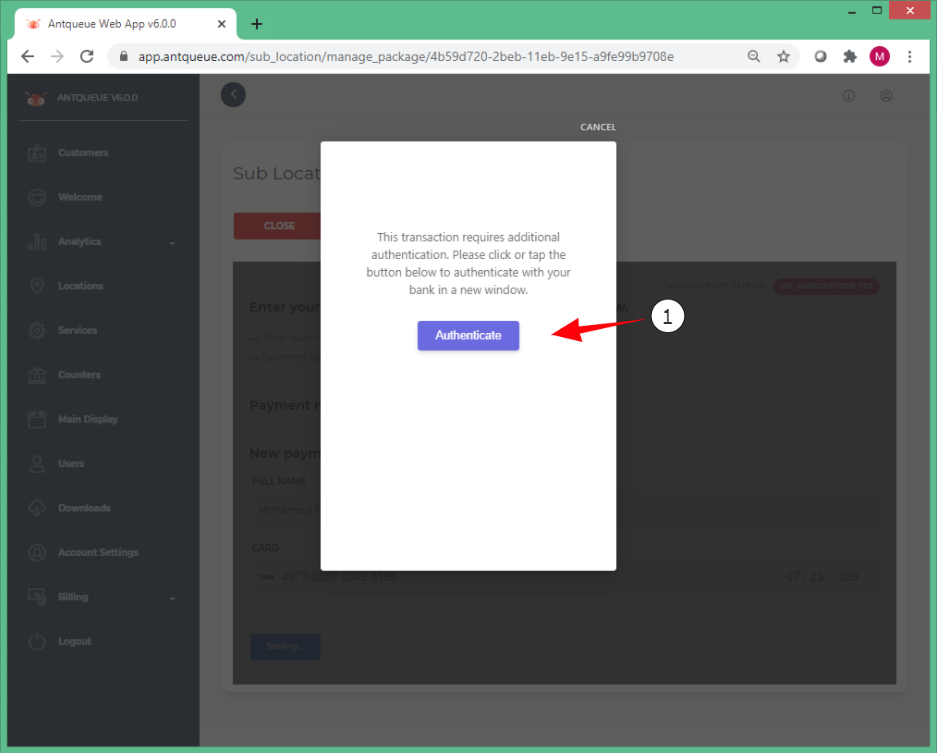
1. Click this button to authenticate your payment.
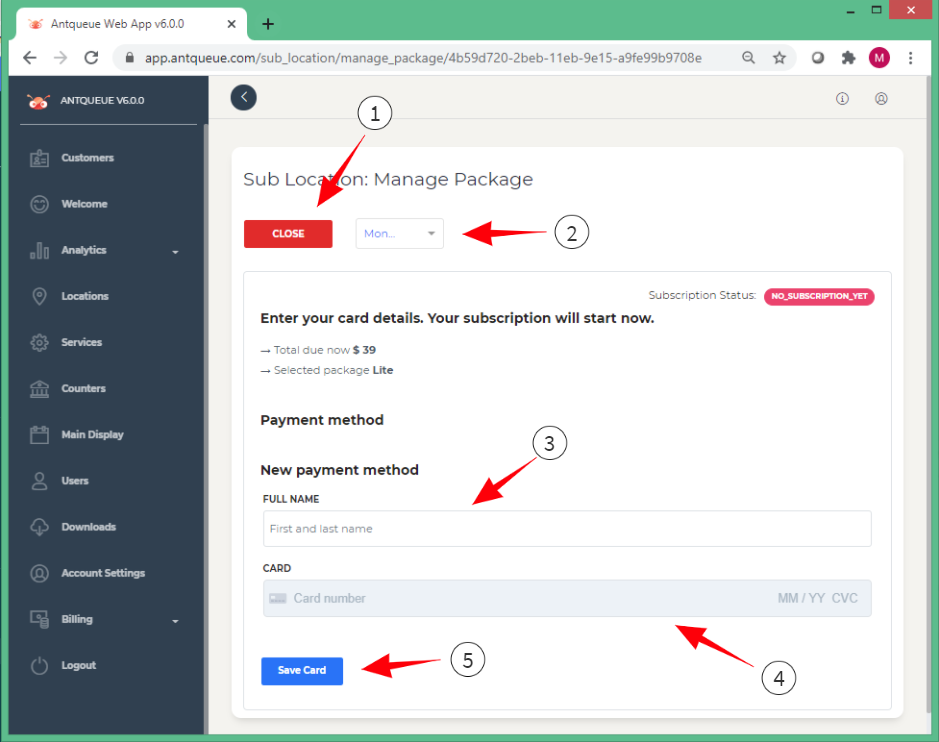
1. Click this button to close this page.
2. Select from the month or year payment cycle.
3. Type credit card owner's name.
4. Type credit card number, expiry month, year, and CVC.
5. Click the save card button to save the credit card process your payment. In case there is an issue with the card, you will see the error in red color below CARD NUMBER.
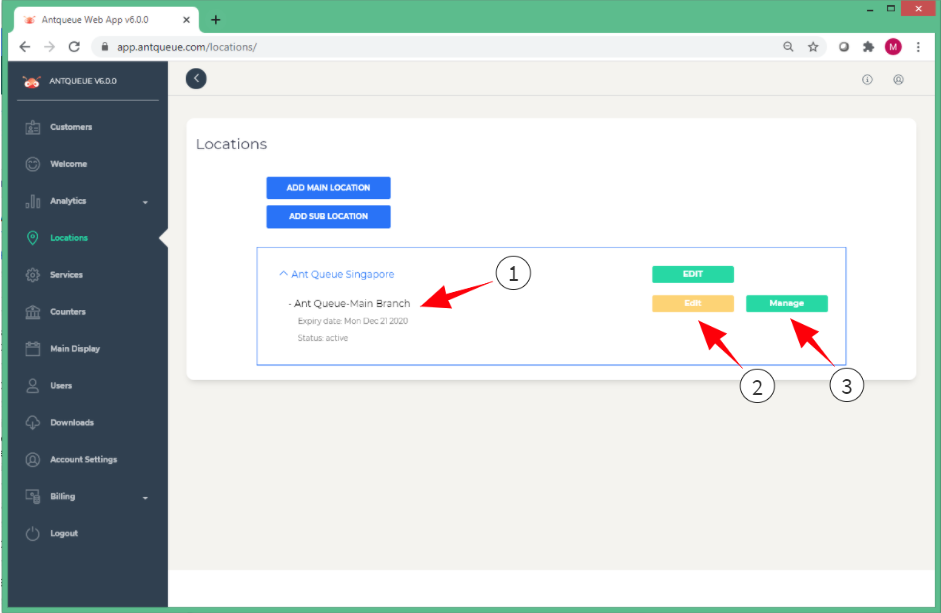
1. If the payment is successfully processed you will see the expiry date under your sub-location name. If you close the payment screen without processing the payment the sub-location will be created. However, the expiry date will not be visible.
2. Click the edit button to edit the information you entered before.
3. Click the manage button to move on with the upgrade of your current package to your preferred package or if you have closed the payment screen without completing it.
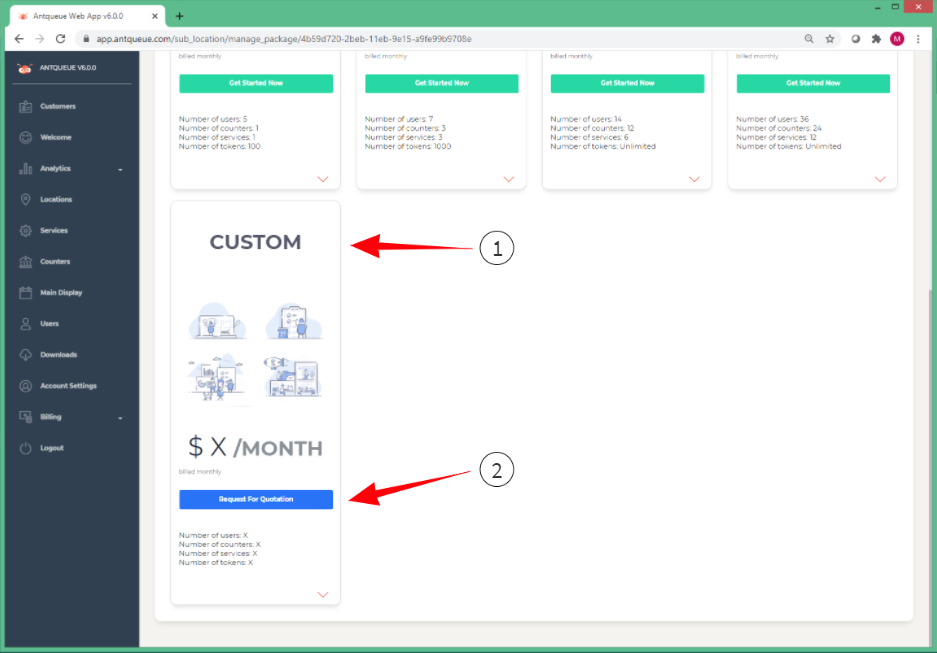
1. This is a custom request card.
2. Click the button to fill up the custom request form. This will initiate communication with our sales team to understand and deliver your request.